Walkthrough 4-4: Create a RESTful interface for a Mule application
In this walkthrough, you continue to create a RESTful interface for the application. You will:
· Route based on path.
· Use a URI parameter in the path of a new HTTP Listener.
· Route based on HTTP method.
Starting file
If you did not complete the previous walkthrough, you can get a starting file here. This file is also located in the solutions folder of the student files ZIP located in the Course Resources.
Restrict method calls to GET
1. Return to Anypoint Studio.
2. Double-click the HTTP Listener in the flow.
3. In the left-side navigation of the Listener properties view, select Advanced.
4. Set the allowed methods to GET.

Make a copy of the existing flow
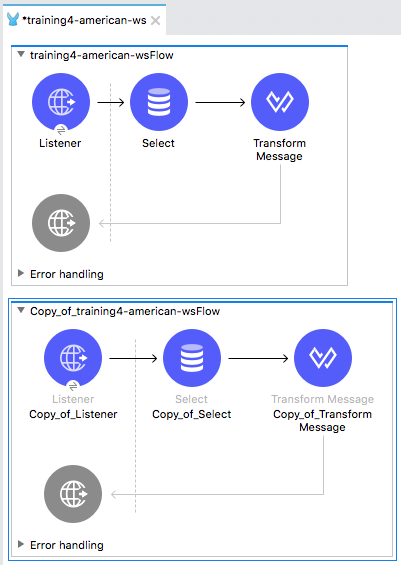
5. Click the flow in the canvas to select it.
6. From the main menu bar, select Edit > Copy.
7. Click in the canvas beneath the flow and select Edit > Paste.
Rename the flows
8. Double-click the first flow.
9. In the properties view, change its name to getFlights.
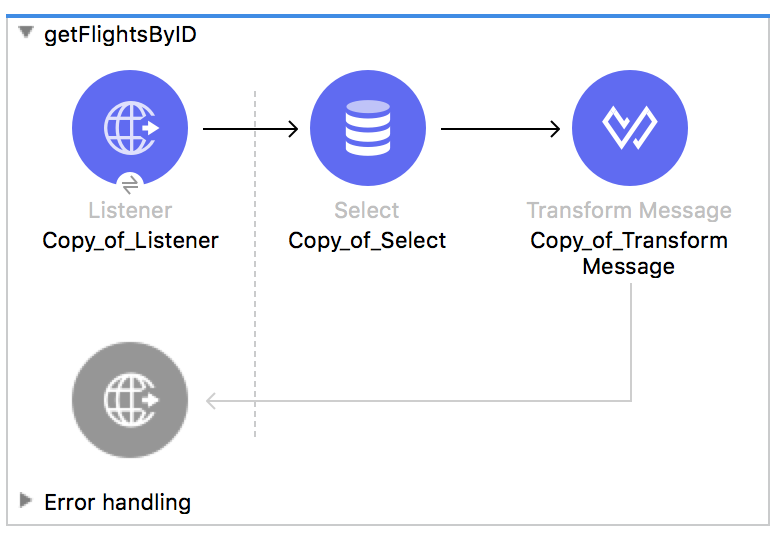
10. Change the name of the second flow to getFlightsByID.
Note: If you want, change the name of the event source and event processors.
Specify a URI parameter for the new HTTP Listener endpoint
11. Double-click the HTTP Listener in getFlightsByID.
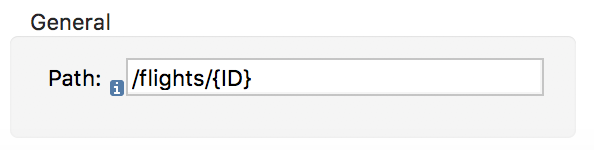
12. Modify the path to have a URI parameter called ID.
Modify the Database endpoint
13. Double-click the Select operation in getFlightsByID.
14. Modify the query WHERE clause, to select flights with the ID equal to 1.
SELECT *
FROM american
WHERE ID = 1
Test the application
15. Save the file to redeploy the project.
16. In Advanced REST Client, make another request to http://localhost:8081/flights/3; you should see details for the flight with an ID of 1.
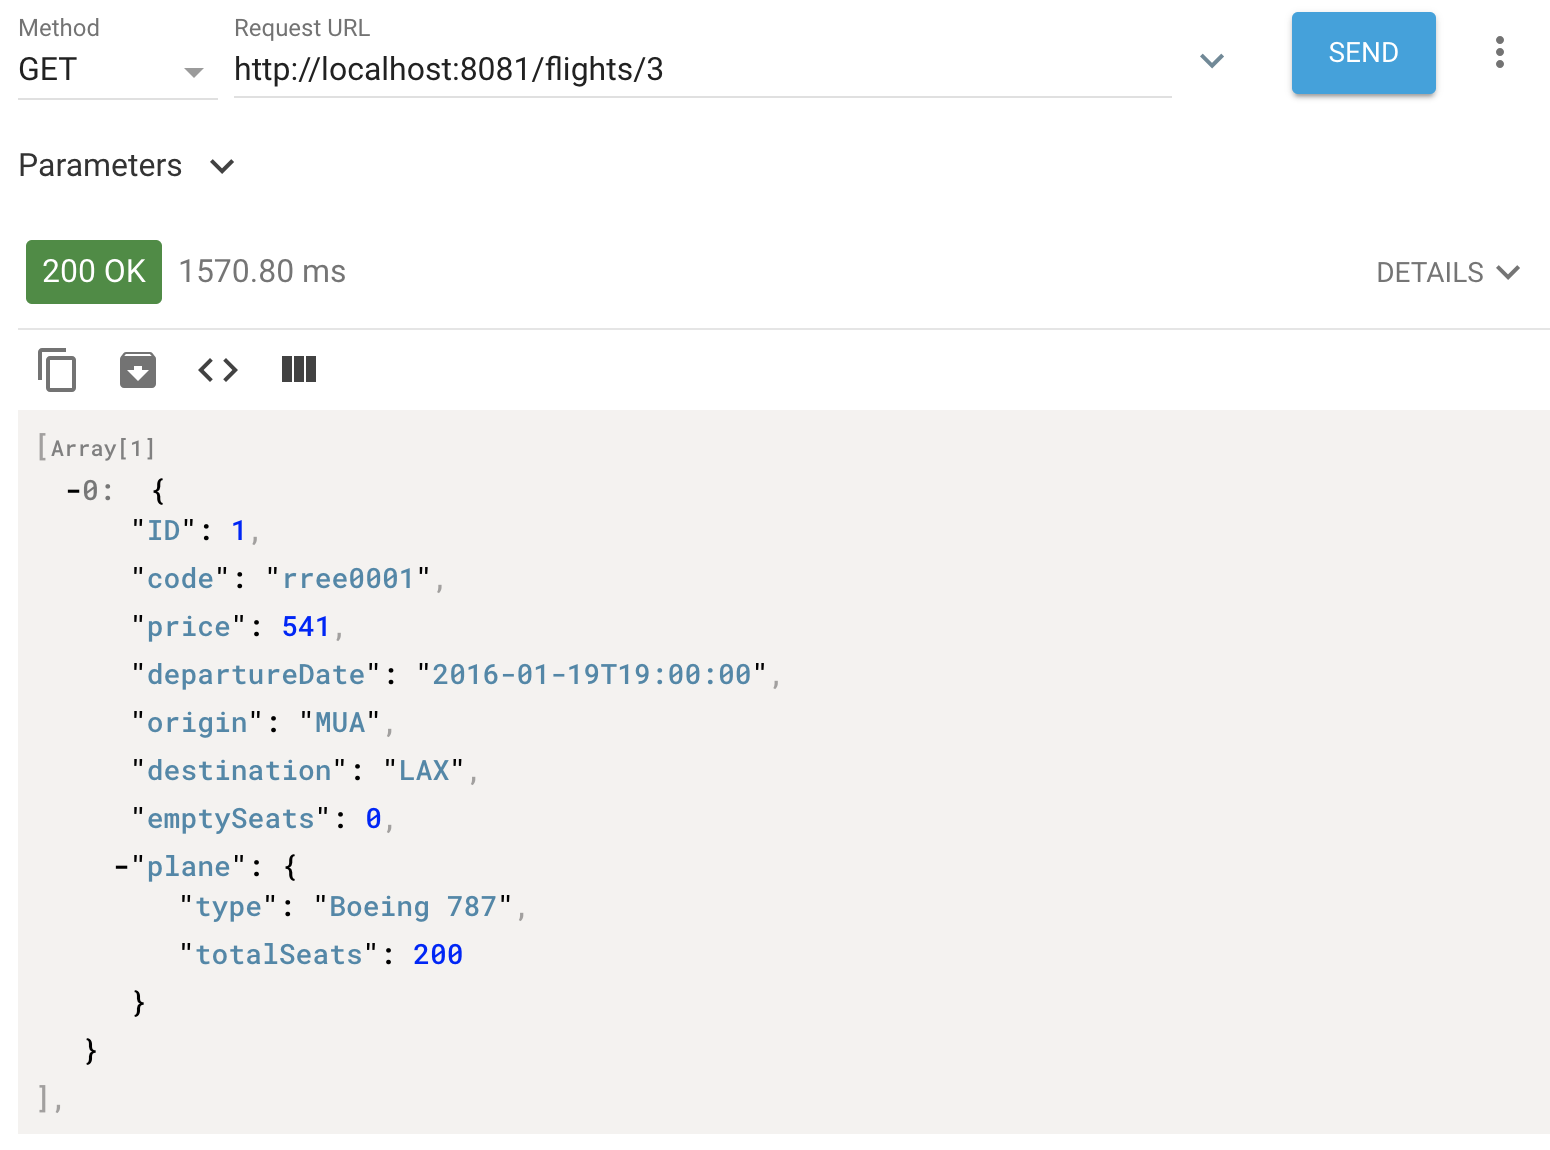
Note: You did not add logic to the application to search for a flight with a particular ID. You will deploy an application with this additional functionality implemented next.
Modify the database query to use the URI parameter
17. Return to the course snippets.txt file and copy the SQL input parameter expression.
18. Return to the getFlightsByID flow in Anypoint Studio.
19. In the Select properties view, locate the Query Input Parameters section, click the Switch to expression mode button, then paste the expression you copied.
{'ID' : attributes.uriParams.ID}
Note: You learn to write expressions in a later module in the Development Fundamentals course.
20. Change the WHERE clause in the SQL Query Text to use this input parameter.
SELECT *
FROM american
WHERE ID = :ID

Test the application
21. Save the file to redeploy the project.
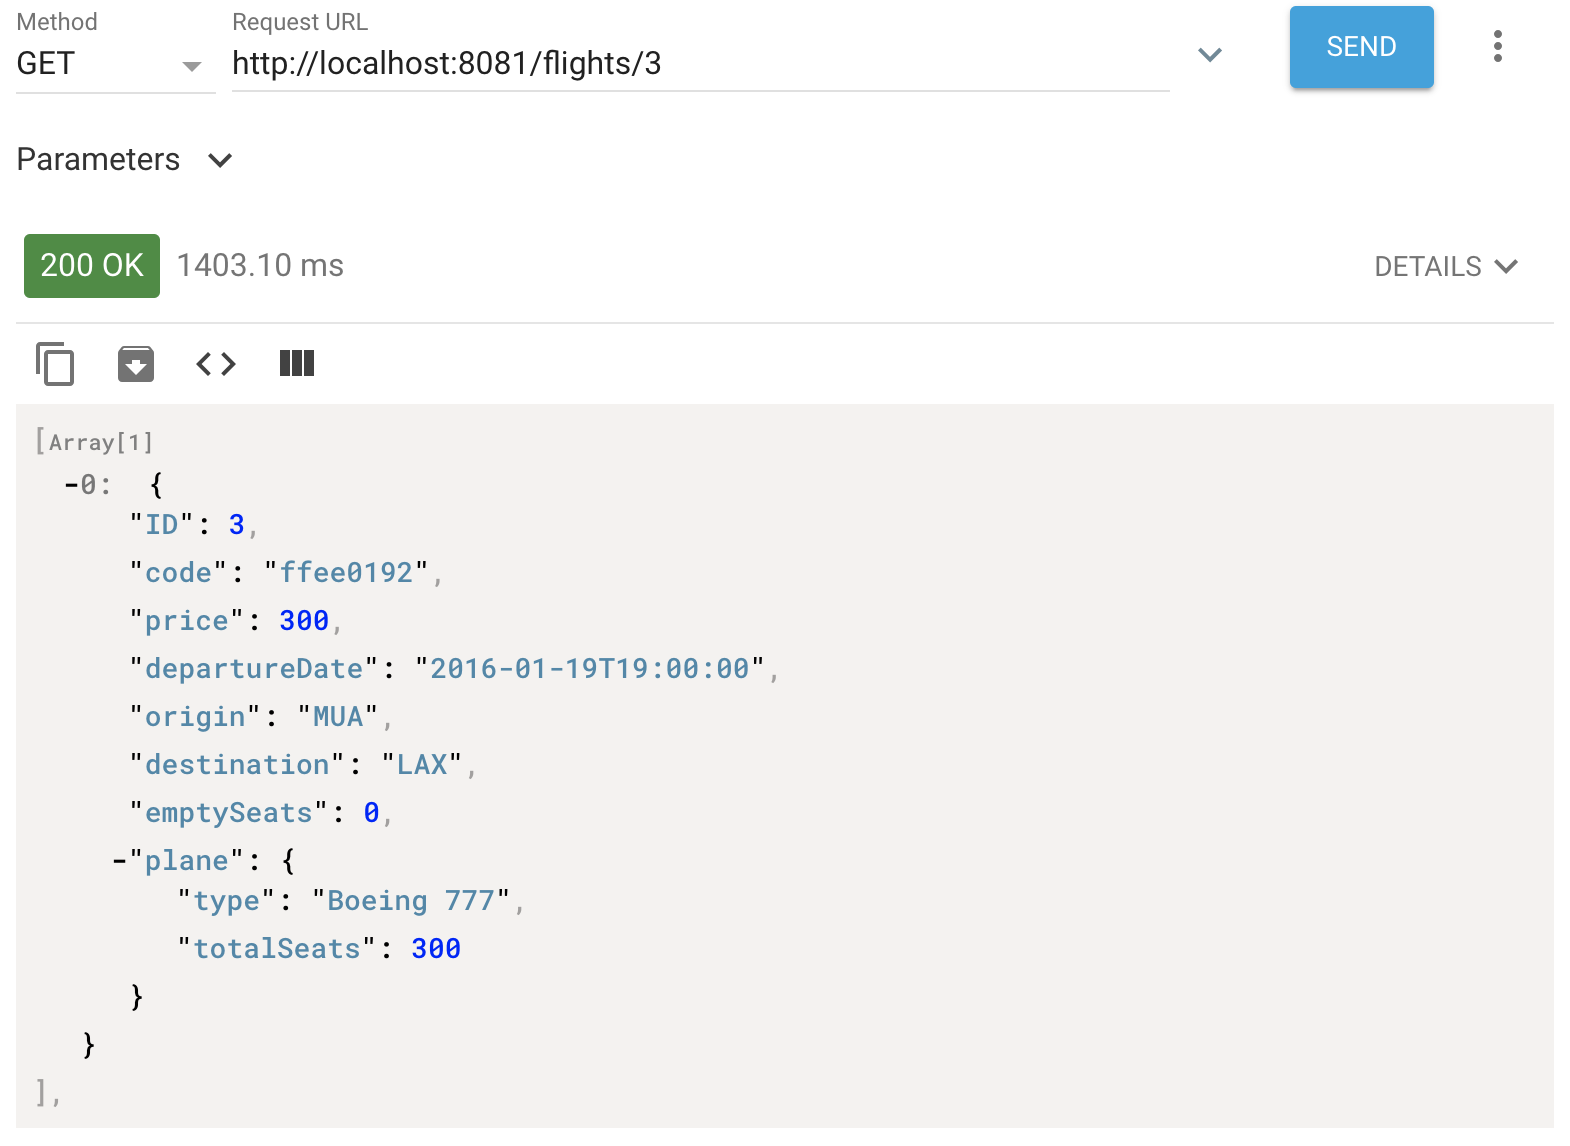
22. In Advanced REST Client, make another request to http://localhost:8081/flights/3; you should now see the info for the flight with an ID of 3.
23. Return to Anypoint Studio.
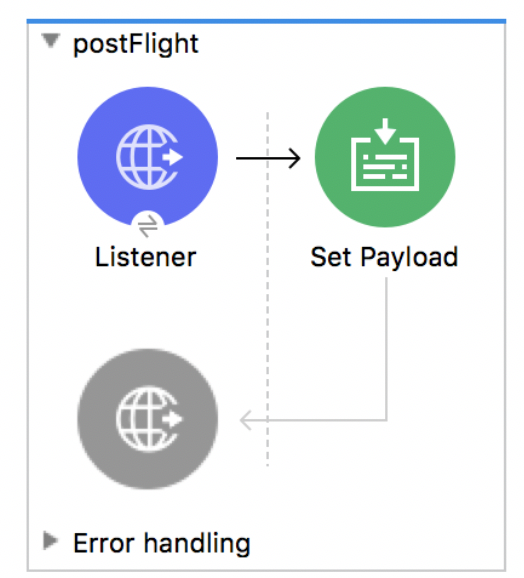
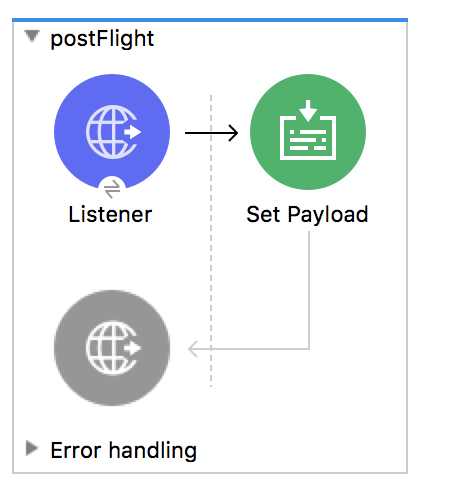
Make a new flow to handle post requests
24. In the Mule Palette, select HTTP.
25. Drag Listener from the Mule Palette and drop it in the canvas below the two existing flows.

26. Change the name of the flow to postFlight.
27. In the Listener properties view, ensure the connector configuration is set to the existing HTTP_Listener_config.
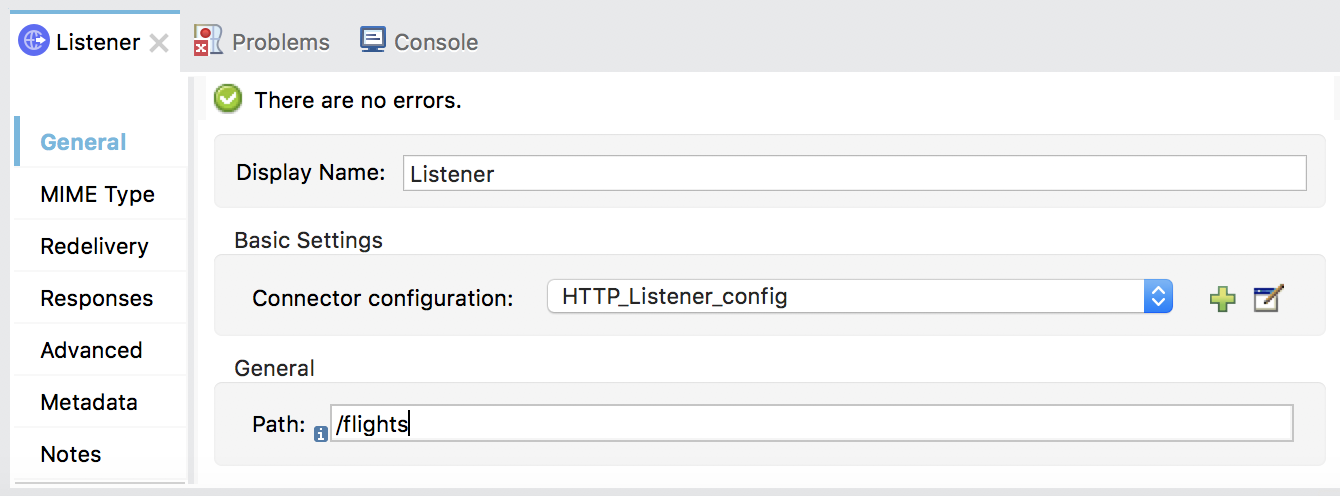
28. Set the path to /flights.
29. In the left-side navigation of the Listener properties view, select Advanced.
30. Set the allowed methods to POST.

31. Drag the Set Payload transformer from the Mule Palette and drop it in the process section of the flow.
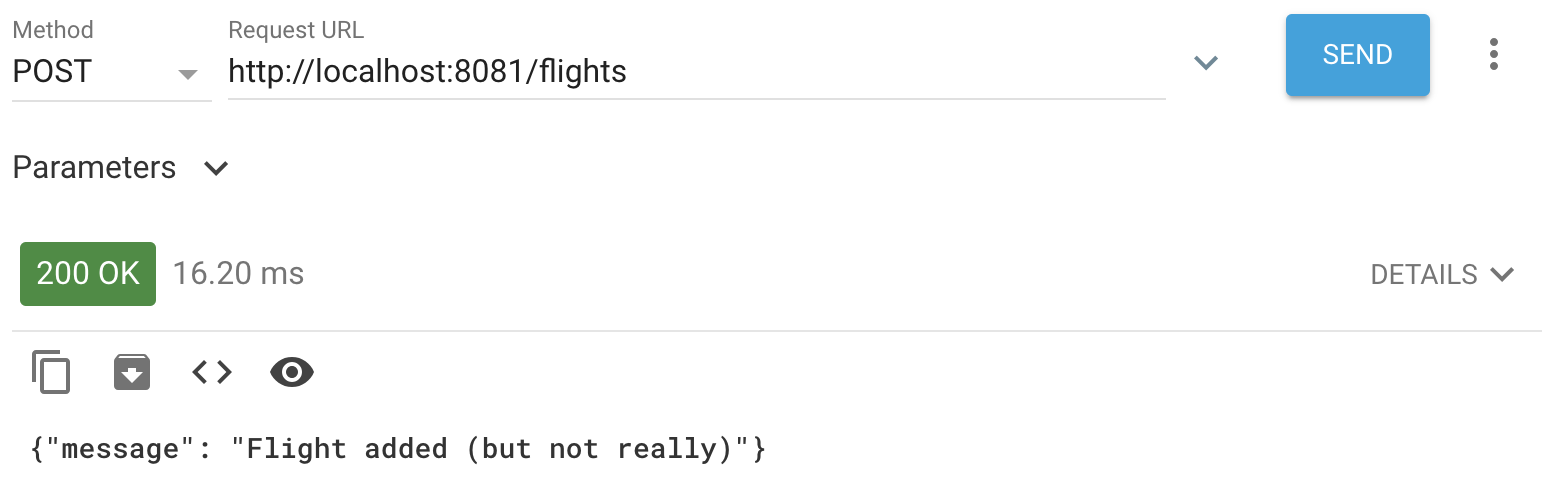
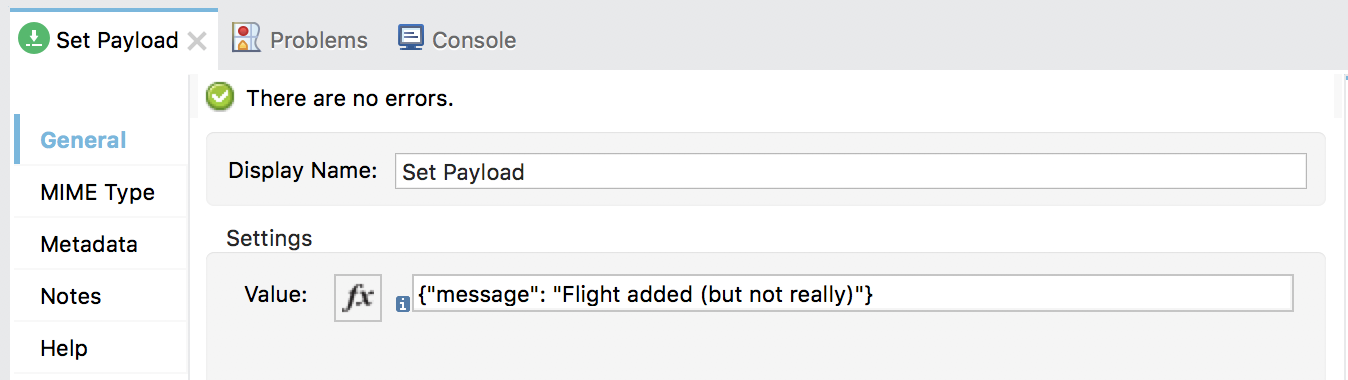
32. Return to the course snippets.txt file and copy the American Flights API - /flights POST response example.
{"message": "Flight added (but not really)"}
33. Return to Anypoint Studio and in the Set Payload properties view, click the Switch to literal mode button for the value field.

34. Set the value field to the value you copied.
Note: This flow is just a stub. For it to really work and add data to the database, you would need to add logic to insert the request data to the database.
Test the application
35. Save the file to redeploy the project.
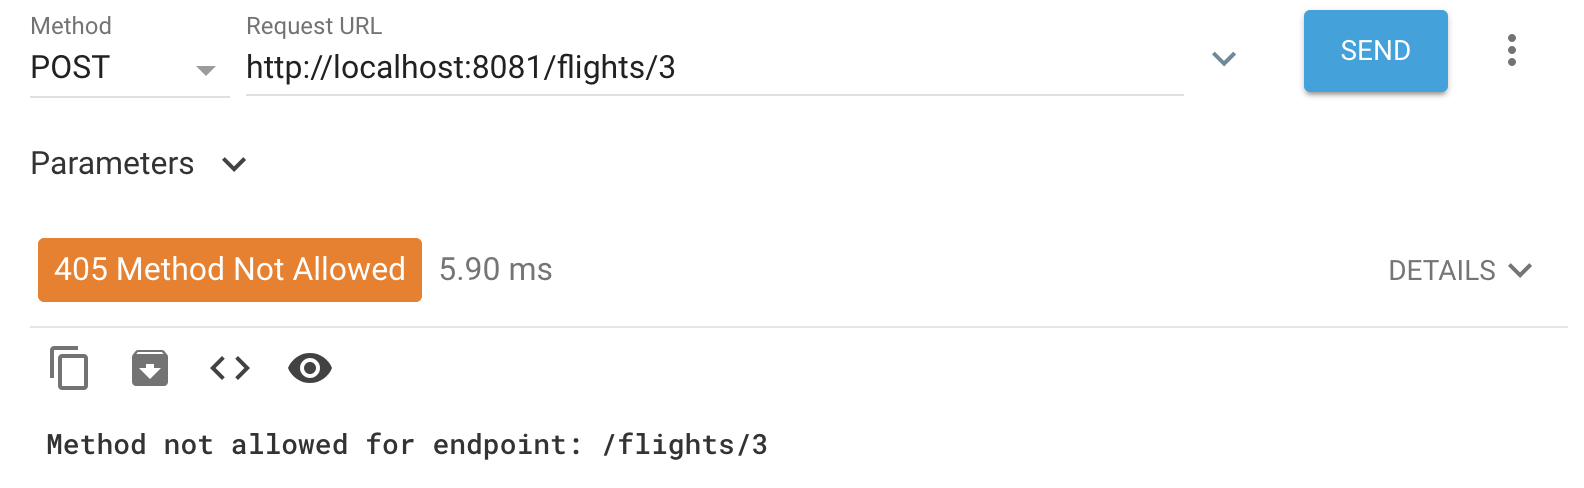
36. In Advanced REST Client, change the request type from GET to POST.
37. Click Send; you should get a 405 Method Not Allowed response.
38. Remove the URI parameter from the request URL: http://localhost:8081/flights.
39. Send the request; you should now see the message the flight was added – even though you did not send any flight data to add.